[Recipe] Locra Papa

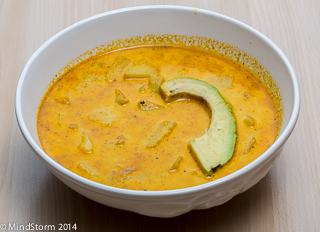
“Locra” means “thick soup”, so one should never say “Locra Papa Soup.”  Rather, it is simply “Locra Papa — the best soup you’ve ever tasted!”

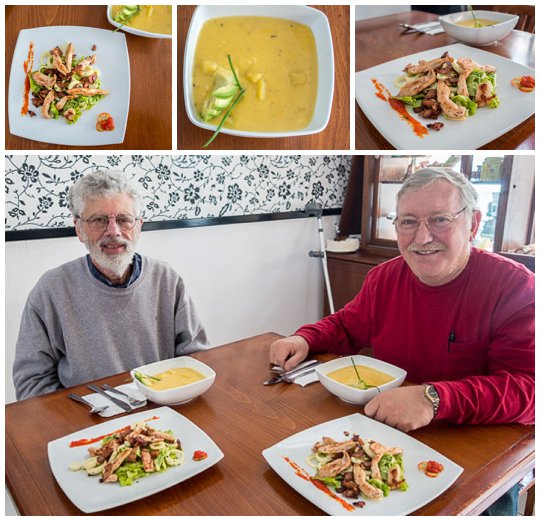
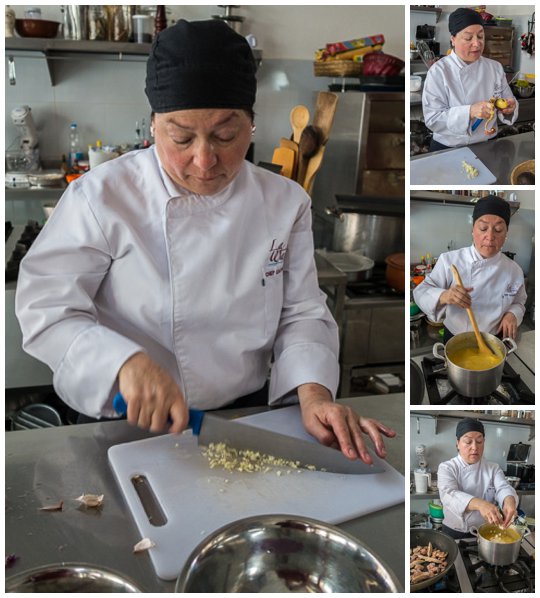
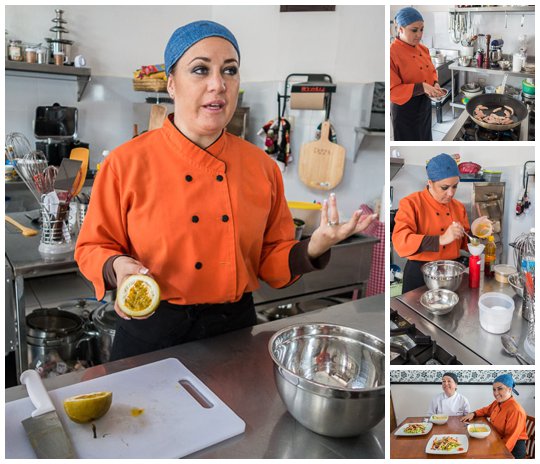
On May 23, I published a blog entry talking about a cooking class I took at La Warmi for locra papa.  I promised I would post the recipe once I had tried it at home.  Here is the fulfillment of that promise.

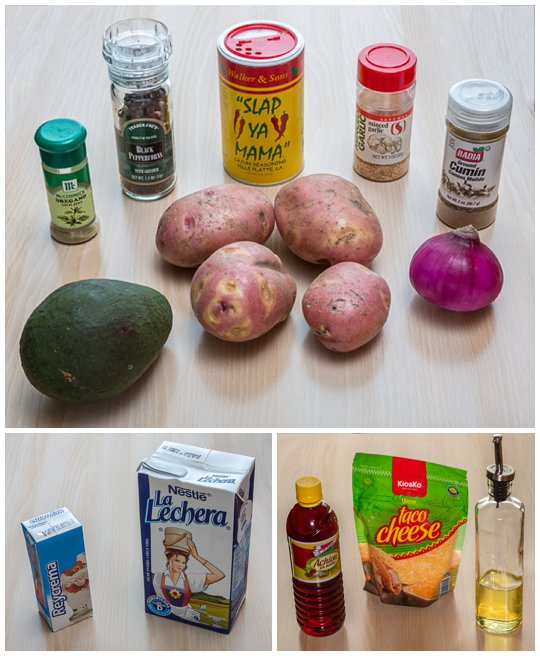
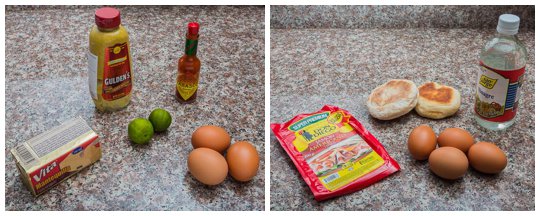
The ingredient list includes Achiote.  I have never heard of this before coming to Ecuador, and I doubt it can be purchased in most grocery stores in the US. It looks like a dark oily liquid.  The teaching chef said that its main purpose is to create the final color.  As such, if you can’t find it, try making the locra without it.  Perhaps something else could be used to create the color if you really want the authentic appearance.
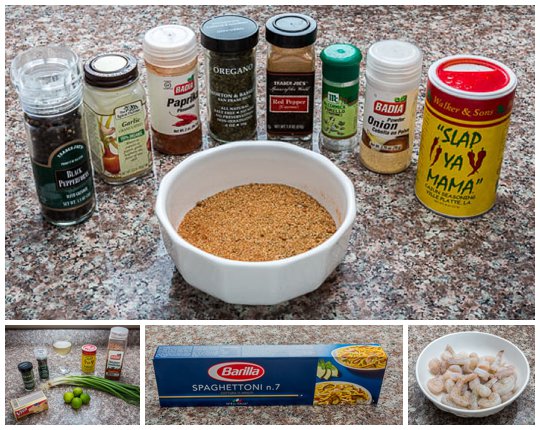
Ingredient List:

  • 3 cups potatoes — peeled and cubed
  • 1 red onion — chopped
  • 1 clove garlic — minced
  • 1 tsp Achiote
  • 1 tsp olive oil
  • 1 tsp cumin seed
  • 1/2 tsp oregano
  • 1 tsp salt (or I substitute Slap Ya’ Mama for salt in almost all recipes)
  • 1 cup milk
  • 1/4 cup cheese (NOTE: The photo above shows ‘taco cheese.’  This didn’t work as well as hoped. Now I use ‘queso fresco’, which works much better.)
  • 1/2 cup heavy cream
  • 1-1/2 cup water (important to measure!)
  • 1 avocado

Note: Be sure to measure the water used.  If you use a different amount of water than the 1-1/2 cup indicated, adjust the milk, cream and cheese accordingly.

  1. Wash the potatoes once cubed.  Rinse until water is clear.
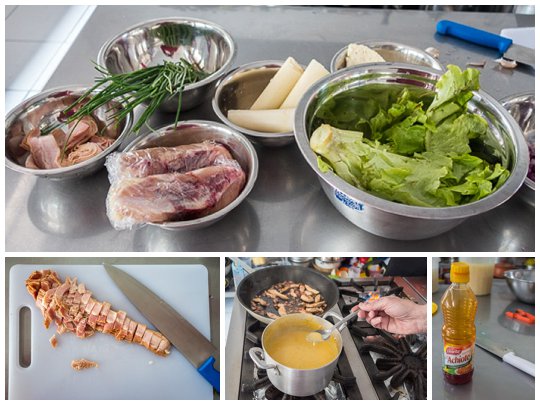
  2. Heat the oil and achiote.  Add onion, garlic, cumin, oregano and salt. Cook until onion is soft (about 5 min).
  3. Add potatoes and cover with water (this is where you measure how much water you use, and adjust all later ingredients if needed).
  4. Cook for 15 min.
  5. Add the milk and simmer for 5 more minutes.
  6. Remove from heat. Add cheese and cream.
  7. Add salt and pepper to taste.
  8. Add avocado to serving bowl before placing on table.

Museum Walk

While in California for Kerry’s graduation (see prior blog post), a couple of friends from Oregon came down to visit. Together, we went to two museums, along with a tour of the Santa Cruz wineries.  The first museum we visited was the Computer History Museum in Mountain View (Wikipedia and Yelp both have more info).  If you have any semblance of nerd in you, this is a must-see stop in the San Francisco Bay Area.

It had a well done presentation of computers from ancient history through the present.  Personally (as a computer software developer for more than 40 years), I was most interested to see all the historic devices on display whose models I owned or used in their heyday.  The first keypunch I ever used when working in college was there.  As was my first SOL computer, HP calculator, ALTAIR, computerized chess board, PDP-8, Mac, etc, etc, etc…

The next day we went to the Disney museum in San Francisco.  It was also a bit of a surprise, taking much longer to go through than expected (we spent more than four hours there).  I basically grew up with Disney cartoons, and went to Disneyland as a child in the late 50’s, but really didn’t know much of the man or company other than the products that came from it.  Walt was described by almost all colleagues as “a nice guy.”  He was also a visionary who saw beyond what others could, and then convinced others to follow his path.

He had several bet-the-company projects (Snow White, Mary Poppins, Disneyland), and had several setbacks. His first successful cartoon — Oswald the Lucky Rabbit — was stolen from him, which spurred him into creating Mickey Mouse. A strike closed the company in 1941.  Almost immediately after that was settled, the start of WWII almost closed him again.  He succeeded in changing direction for the war, which almost resulted in his going out of business yet again when the war ended.  Each time he rose to the challenge and changed the direction of the company to make it stronger than before.

School’s Out!

Kerry Jones, our favorite niece (OK, our only niece, but still our favorite!) graduated high school today.  After this week, she is officially a college student, attending University of California at Santa Barbara.  She will be majoring in chemistry in the College of Creative Studies.  With fewer than 350 students, this is a very elite school to get into.

We flew from Ecuador to California for this once-in-a-lifetime event.  After the last few cool months in Ecuador (where we are entering Winter), it was a shock to sit in the bleachers on a June Sunnyvale Summer, but worth it to see her reach this milestone.  After the formal celebrations and speeches, Kerry walked around the quad meeting friends and taking “one last photograph” with them.

Kerry with her High School friends.

The family was all there to help celebrate her graduation too.

We then went out together for dinner with the extended family, before Kerry left for her all-night Senior Graduating Party.

Mr MaGoo


Mauri MaGoo is a polished professional magician here in Cuenca.  We first saw him last October in a show with four other local magicians. Tonight’s show was advertised as being just him, but there were actually several others, plus a ventriloquist as Emcee.  Unfortunately, the show involved a lot of very fast Spanish, very little of which I was able to understand.  Also, as seems typical in Ecuador, the speakers were set to full volume, which created massive distortion — seems every speaker in town is set to maximum volume whenever on…

The show was heavily oriented around the young, with audience kids brought up to participate in many of the tricks.  The magic varied from normal slight of hand, through some card tricks (that I now know how to do, after our trip to Harry Potter World in April!), to jaw-dropping performances.  Most of the latter were by Mauri MaGoo himself (in the lower right image above).

20 Years of Mobile Surgery

Today and for the next two days, we are with CinterAndes — a mobile surgery team that travels around Ecuador performing free surgery for those unable to pay for such needs. They obtained their surgery truck (shown above) 20 years ago today.  It is amazing how much they can accomplish in such a small space.  CinterAndes desperately needs a new truck though, and is currently working with various organizations such as the Rotary Club Cuenca, to try to raise the $300,000 needed.  The expected new truck will be slightly larger (can’t be too big or it won’t be able to navigate many of the roads in the outlying areas), and will have updated medical equipment.

The team travels with a full complement of doctors needed for performing surgery.  Dr Edgar Rodas (center in the image above) founded the organization in 1990. Among many other awards, he received the 2009 Surgical Humanitarian Award from the American College of Surgeons. The other volunteers are a rotating combination of advanced medical students and professional doctors.

Watching them work is a sight I had never expected to be able to witness.  I have been on the table as a patient a few times in my life, but this is the first time I was able to watch the process unfold. 13 surgeries were performed over a two day period.  The Mission de Guadalupe (in the Amazonian jungles of Southern Ecuador) where we visited, also had an operating room, so both the mission room and the truck were kept busy from 8:00AM until 9:30PM each day.

Families waited outside while surgery was taking place.

On the way back, everyone stopped at Parque Nacional Podocarpus for a swim beneath a waterfall.

Claudio Velez, one of the surgeons, brought along his guitar and entertained everyone near the waterfall, before heading the long drive home.

[Recipe] Eggs Benedict

A favorite Sunday brunch indulgence of ours is eggs Benedict. We haven’t found a good one here in Cuenca, so I decided to give it a try.  I was surprised by just how easy it is to make.  Of course, it has enough calories and fat that we will still hold it back for special occasions…

The image above-left shows the ingredients for the hollandaise sauce, while above-right shows what is needed for the rest of the eggs Benedict.  Notice how many eggs are in those two photos?

Hollandaise Sauce

Ingredients:

  • 3 egg yolks
  • 1/4 tsp Dijon mustard
  • 1 tbsp lemon (or lime) juice
  • 1 dash hot sauce (such as Tabasco)
  • 1/2 cup butter

If you are lucky enough to have a niece like Kerry that buys cooking aids as a Christmas gift, you might have a handy yolk extractor like this too!

If you follow Julia Childs, you will build up your arm muscles in making the sauce.  I prefer a simpler way — using a blender.

  1. Heat the butter in a microwave until very hot — about a minute. 
  2. Combine everything except the butter into a blender. Cover and blend for about 5 seconds.
  3. Remove the blender cover and pour the butter in a small stream into the blender while running on high.

The sauce should thicken almost immediately, as the hot butter cooks the egg yolks.  Remove the blender container and place it in a pan of hot water to warm it up before serving.

Eggs Benedict

Ingredients:

  • 2 English muffins
  • 3 tbsp white vinegar (optional)
  • 4 large eggs, fresh as possible and at room temperature
  • 4 slices ham or Canadian bacon
  • Hot batch of Hollandaise sauce (see recipe above)

Slice the muffins and toast them. Place a slice of ham on each open face side.

The only tricky part here is the poaching of the eggs.  There are several gadgets to make it easy, but those aren’t really needed. Crack each egg carefully into separate coffee cups.  Boil a pot of water, at least two liters (half gallon).  When the water is boiling, swirl the water, creating a vortex.  Slide one egg into the vortex and cook for 2 to 3 minutes. Remove with a slotted spoon and place on the muffin and ham.  Repeat with each egg.

Pour the hot Hollandaise sauce over the top and serve immediately.


Joys of Home Ownership

We love our new apartment here in Cuenca.  One of the things we were glad to be rid of was the ongoing maintenance we had on a California house built in the 1920’s.

Seems that follows wherever you own property though…

There is a parking lot next to our building, and about a month ago the lot attendant pointed out to our building security guard that there was a wet patch on the outside wall.  After some analyzing of photos vs visible windows and support beams, we concluded it was in one of our showers.  We were told it would cost about $200 and take a day to fix, so we said to go ahead.

As happens everywhere, the problem was harder to find than expected, took longer (a month instead of a day), and required finding more parts and tile than originally planned.  A month later, we can finally use the shower again, and the final cost was $400.  At least when the overrun is 100% here, the pain is still pocket change…

Of course, the day the shower was fixed, we finally had an electrician look at adding an outlet we wanted.  In the process, he broke a ceiling light, so now we have to wait for parts for that.  Seems there is always something…

Locra Papa with La Warmi

Locra Papa is an Ecuadorian specialty that Evelyn loves when done well. La Warmi held a cooking class this morning in which they taught how to make it, along with a chicken and hearts-of-palm salad.  I decided to go and see if I could learn anything useful.  I ended up eating the absolute best locra papa and salad I have had since coming to Ecuador!  There were only two of us in the class, after three people cancelled. I doubt those people have any idea what they missed, but WOW!

By the way, “locra” means “thick soup“, so it is a faux pas to refer to it as “locra papa soup“…

Here are some of the ingredients.  I plan on making this at home soon, and will post a full recipe once that is done.  Lower-center shows me taste testing, and declaring the locra ready!

Kathy Abad is the main teaching chef.  She speaks almost no English, but can cook up one heck of a meal.

Virginia Lopez is the assistant chef. She speaks perfect English, as well as being an excellent chef in her own right. She does almost all the verbal teaching in the class.

Unfortunately, La Warmi doesn’t have a web site up yet, so I can’t provide a link to them.  If you want to find out what classes are coming up, contact Virginia, at least for the next couple months.  She did announce that she is moving to Salinas in July, so I am hoping Kathy can find someone else as talented to work with her to continue these classes.

[Recipe] Pasta With Spicy Shrimp

I had lunch with a local restaurant owner last week, and took the opportunity to ask him where he buys meat and seafood. I mentioned that I had bought some shrimp for paella from the local mercado, and he immediately piped in “I’ll bet it was bland, soggy and tasteless, right?”  And yes, he was right, so obviously I asked where to get the best shrimp in town.

I get mine at the freezer section of SuperMaxi,” he replied. 

Huh???” was my immediate intelligent question…  He told me that the frozen shrimp are flash frozen on the boat, and therefore as fresh as possible.  On the other hand, the shrimp at the mercado came to shore, was trucked from the coast to Cuenca, and then sat in a pot on the counter waiting for me to buy it.  The flash frozen wins hands-down every time.

Of course, this had to be put to the test, so I bought a bag of frozen shrimp the next day at SuperMaxi, and decided to make some spicy shrimp pasta with it.

Gotta say, this is the best pasta I have ever made, and the shrimp was indeed far better than the mercado.  This recipe quickly found itself into my ‘favorites’ list, and will be made again for guests in the future.  I got the original recipe from the Food Network website, but as always, have made my own modifications.

This recipe does have quite a lot of ingredients.  However, the primary spice mix can be made in a larger batch and then the unused portion can be stored for future meals.  The main spice mix consists of:

  • Paprika, 2-1/2 tbsp
  • Salt, 2 tbsp (I use “Slap Ya Mama” spice mix in lieu of plain salt)
  • Pepper, 1 tbsp
  • Garlic Powder, 1 tbsp
  • Onion Powder, 1 tbsp
  • Ceyene Pepper (aka “red pepper”), 1 tbsp
  • Thyme, 1 tbsp
  • Oregano, 1 tbsp

Mix all the ingredients in a small bowl.  I then store this in a small spice bottle, which I label “spicy shrimp mix.”

The main ingredient list then includes:

  • Spicy Shrimp Mix, 2 tbsp  (see above for how to make this)
  • Olive Oil, 2 tbsp
  • Butter, 4 tbsp
  • Minced Garlic, 1 tbsp
  • White Wine, 1/2 cup
  • Lime Juice, 1/4 cup (here in Cuenca, I always use fresh-squeezed)
  • Salt, 1/2 tsp  (I again use “Slap Ya Mama” here)
  • Pepper, 1/4 tsp
  • Red Pepper Flakes, 1 tsp
  • Spaghetti, 1 pound 
  1. Cook spaghetti according to its directions.  Meanwhile:
  2. Start by tossing the shrimp in the Spicy Shrimp Mix until coated.
  3. Place olive oil and half the butter in a large skillet over high heat.
  4. Add the shrimp in a single layer.  Cook for 2 minutes.  Turn shrimp over.
  5. Add garlic.  Cook for 30 seconds.
  6. Add wine, lime juice and remaining butter.  Cook for approx 1-1/2 min, or until shrimp is pink.
  7. Season the shrimp with salt and pepper to taste.
  8. Add the pasta and red pepper flakes.  Toss well and serve hot.

We have also found that this meal is fantastic as left-overs.  We add a small amount of water, then microwave covered until hot.  Tastes almost as good as the first day.

Photo Galleries

At the top of this page is a menu that will take you to a variety of galleries showing our favorite images.