Now that we have been in Cuenca, Ecuador for a week, we are starting to settle in and our initial routine is taking shape. I came down with a 24-hour flu last night, and have barely able to get out of bed most of today. I thought this might be a good time to take a random walk down some initial observations and thoughts about this city sitting high in the Andes on the equator.

DVD’s here are an easy home entertainment. There is no Netflix available, but when you can buy the latest Hollywood release for $1.25, who needs to bother with rentals? Yep, go into any of several DVD stores in town and pick out Men In Black 3, Expendables 2, Taken 2, etc and get 4 for $5. Take them home and discover they are the same DVD that you would have bought back home for $20 each. Almost all are in English. Some have Spanish subtitles (good for learning the language), while others have a language option allowing you to play it in English, Spanish or Portugese. And yes, they are pirate copies…
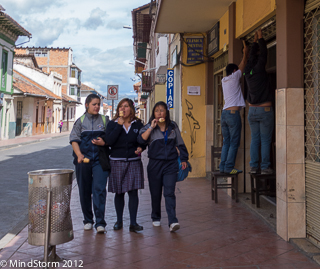
The sidewalks here are pretty narrow, allowing 3 people shoulder-to-shoulder in most places. Schoolgirls are a plague, often seen walking arm-in-arm 3-abreast, talking rapid fire as only schoolgirls can, oblivious to anyone coming the other way — those others just need to get off the sidewalk to make way… 🙂 (Note: This particular image I captured has the girls eating ice cream rather than arms locked, and this is one of the wider sidewalks in town, but the girls act the same regardless of space, and “own the sidewalk”)
Car sirens are a common sound downtown. Like a child crying wolf, they are ignored though. I heard one siren yesterday, and noticed a policeman 1/2 block away that did not even bother turning his head to look. The alarms have no value when they are heard so often…
There is a surprising amount of jiggle in the midriff of schoolgirls walking down the street. Everyone in the city walks a lot, and there are hills to conquer. The food here is fresh and American fast food can only be found in the malls at the very edge of town. So why are the girls so fat? Not really American-style obese, but definitely heavier than we see in many other countries. Surprising…
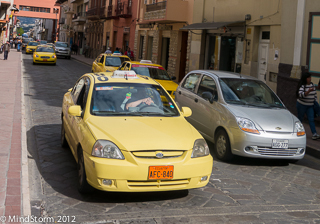
Taxis are ubiquitous and cheap. $2 gets you anywhere around town, with $2.50 to go to the outlying malls. Of course most Ecuadorians make under $5/hr, and many make under $2/hr, so it only appears cheap to us. We only use the taxis ourselves when returning from a mall resupply trip, or perhaps when returning from the other end of town late at night. Walking is a way of life here, and I hope to come home needing new pants… (Note that the 6 taxis active on one block downtown, as shown in this photo, is a very common site)

Spanish school is unsettling at this point. More on that once I can figure out just what I think about it, and perhaps make a change in my approach.
It is COLD here at night. At least it seems that way to us. We bought a room heater when we were here in February, and were pleased to have the apartment manager return it to us our first night here. We have met other gringos that say they like the temperature though, so maybe we have just gotten soft. Regardless, our heater is on from around 7PM through 9AM every night so far.
Rain is less predictable than we thought. On our February trip, it rains promptly at 4:00 every afternoon, and was done by 5:00. This time we have had it rain at night, in the morning, in the afternoon, and not at all. Local Cuencanas all say the weather cannot be predicted, and I am starting to believe they are right.
Gringos seem to be everywhere. Walking down the street, most of the people are certainly locals, and Spanish is the most common language. However, it seems you can’t walk more than 15 minutes before hearing another English conversation between couples, or see someone that is clearly a gringo — sometimes only a couple minutes between contacts. We had dinner with an American that has lived in Mexico & Ecuador for the past 23 years, and she tells us that is because we are walking in the Central and Commercial districts, but that English is rarely heard where she lives.
Smoking is almost nonexistent. I think I may have seen 4 or 5 men smoking cigarettes in week we have been here. No cigars and no women smokers. Yeah!
And let’s not forget to mention how friendly everyone here is. At home, I eat at several restaurants for lunch, and after 7 years, do not know the names of any of the waiters, and have never once met anyone else eating in a restaurant, unless it was someone I knew from before. We have been here less than a week, and have already met close to a dozen new friends, several of which we have followed to other venues, and exchanged emails with tips and hints. It is taking me a little bit to get used to this new way of thinking about “strangers on the street.”